I still need to make a video flythrough which i will make, put on my youtube account then embed on this blog.
Thursday, 18 April 2013
Rooftop Project - Coming Soon
My Rooftop Project development will be posted here very soon. I might update my portfolio first with the final shots i have already taken.
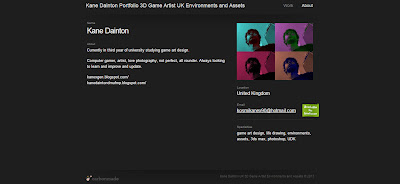
My Portfolio
I joined a free portfolio making website allowing me to post my best work in a professional manner and showcase my current skills. The project limit is 5 and the picture limit is 35 for the free version which is enough really to show a persons work off to an employer. Few pictures of key quality, attention grabbing work is better than many pictures containing a mass amount of space filling work where it could get a bit boring. Im still not confident on the quality of my work. However, when out of university course time and project deadlines, i will personally improve my work to hopefully and potentially reach current industry standard. For the sake of this course, i will try to display my work and skills to the best of my ability. The link is below:


I will add this to my side bar too and on my FMP blog, in the near future.
Outso Project - Character Design Dev 8 - Complete
I would say
my character is complete but I am not completely happy with her as the hands
need more work and the textures in terms of getting proper folds in the
clothing, however I am not experienced with zbrush. I could have unwrapped the
face a bit better and given more space in the UVs.


I am overall
happy with my progress making characters even though it is not my desired
specialty. At least she looks believable and hopefully close to the concept
which is all I used to help me make her. I used a simple female blueprint and
adjusted to body accordingly but it still isn’t perfect, just believable and I
achieved making the body and facial features look female which I am happy with.
Outso Project - Character Design Dev 7 - Rigging
I
fully rigged my character using the basic vertex and envelope wrap methods to
give my character a bit of life. I did manage to rig each finger, arm, leg,
chest, back and certain clothing movements but I came across the common problem
where, if she moves her head far back or forward enough, the chin distorts and
stretches. I remember being taught how to fix this in year 1 but I forgot what
to do. Otherwise it has been my personal best rigged yet.


Outso Project - Character Design Dev 6 - Texturing
I placed in a base colour on the UVs to get a quick result to begin with and show a finished product. Obviously any further detailing and adjustments to the textures will gradually improve the overall outcome. I think with me, the quality of my work shows with how much time i have spent on it and that would apply to everybody. Because i fell back with time as i had interest in the other projects, i dont think i spent enough time as i would have liked but i still made an effort to put in a few minor details.

Textures were hand painted using the colours from the concept. My normals are dire in terms of cloth folds so I would like to research further into making it look more convincing because it is very important. Finished model is below. I used normal default 3DS Max rendering and Xoliul Shader 2 to display my work.


Textures were hand painted using the colours from the concept. My normals are dire in terms of cloth folds so I would like to research further into making it look more convincing because it is very important. Finished model is below. I used normal default 3DS Max rendering and Xoliul Shader 2 to display my work.

Outso Project - Character Design Dev 5 - Unwrapping
Model
was fully unwrapped quite fast and I am pleased with the outcome. I worked hard
to use up as much space as possible for the more important body parts.


My main unwrapping method was to cut seams into the right places around the clothing, pelt map any rounded areas such as the hair, face, hat, top and bottoms to stretch them out. I used relax afterwards to fix up the over stretched polys making the UVs smooth and accurate when painted on which seems to work just fine. The seams i made for the jacket and bottoms were simply cut down her sides like clothes usually can be woven, so before this i separated them into those half and half smoothing groups and when unwrapping, i separated them to have their own space. I would just need to watch out when painting on the textures and make sure the colours are consistent.
Outso Project - Character Design Dev 4 - Clothing, Hair, Extras, Cleaning up
I
completed the body by attaching and welding the hands to the arms and head to
the neck then cleaned up and perfected the final shape I wanted the body to be.
The methods I used for creating clothes was simply selecting parts of the body such
as the legs and waist together and chest and arms together for the shirt and
trousers. I duplicated these parts of the mesh and added a shell modifier to
them which automatically extrudes out to look like clothing then you need to
delete the inside unseen verts and polys. I then added the extra details of
frills in the arms and simple planes for the neck frills and red pin. The boots
were modelled simply so I had no need to model feet on the body. I created the
hat from a cut down sphere as shown in the concept so that I could avoid
modelling and attaching the ears for her head because the hat has ear flaps
anyway. Working around the head and fitted hat, I made the front streaks of her
hair with curves planes and I separately made the bushy part of the hair behind
the head, modelling from a cylinder. I made the small pouch to go on her simple
waist belt I made, just to separate the body a bit colour wise. I thought the
extra straps are unnecessary and I will just add folds in the clothing and the
button details on the jacket to finish off ready for unwrapping.


Adding
the clothing I realised I passed the 9000 tri budget but to fix this, I can
delete unwanted body parts underneath the clothing because the clothes came
from the body as it is and those can be rigged as the body. With some
characters in games the clothes are a substitute for the body as their clothes
do not change at all throughout the whole game so I will go with this to get
back below the budget.
Subscribe to:
Posts (Atom)